Self-Hosting Foundations
Self-hosting means running your own services instead of depending entirely on third-party platforms. That can be a website, a private file sync, a database, a dashboard, a VPN, an automation service, or a monitoring stack.
The point is not to host everything yourself. The point is to understand enough of the stack that you can choose where your data lives, how services are exposed, how backups work, and what tradeoffs you are accepting.
Why Self-Host?
Self-hosting is useful when one or more of these matter:
- Control: You decide where data is stored, how long it stays there, and who can access it.
- Privacy: You reduce dependency on platforms that monetize behavior, metadata, or lock-in.
- Learning: You get practical experience with Linux, Docker, DNS, networking, TLS, logs, backups, and monitoring.
- Customization: You can combine tools in ways managed SaaS products do not support.
- Cost discipline: For some workloads, one small server can replace several subscriptions.
It is not always cheaper, safer, or easier. A badly maintained self-hosted service is worse than a reliable managed one. Use self-hosting where the ownership is worth the operational responsibility.
The Mental Model
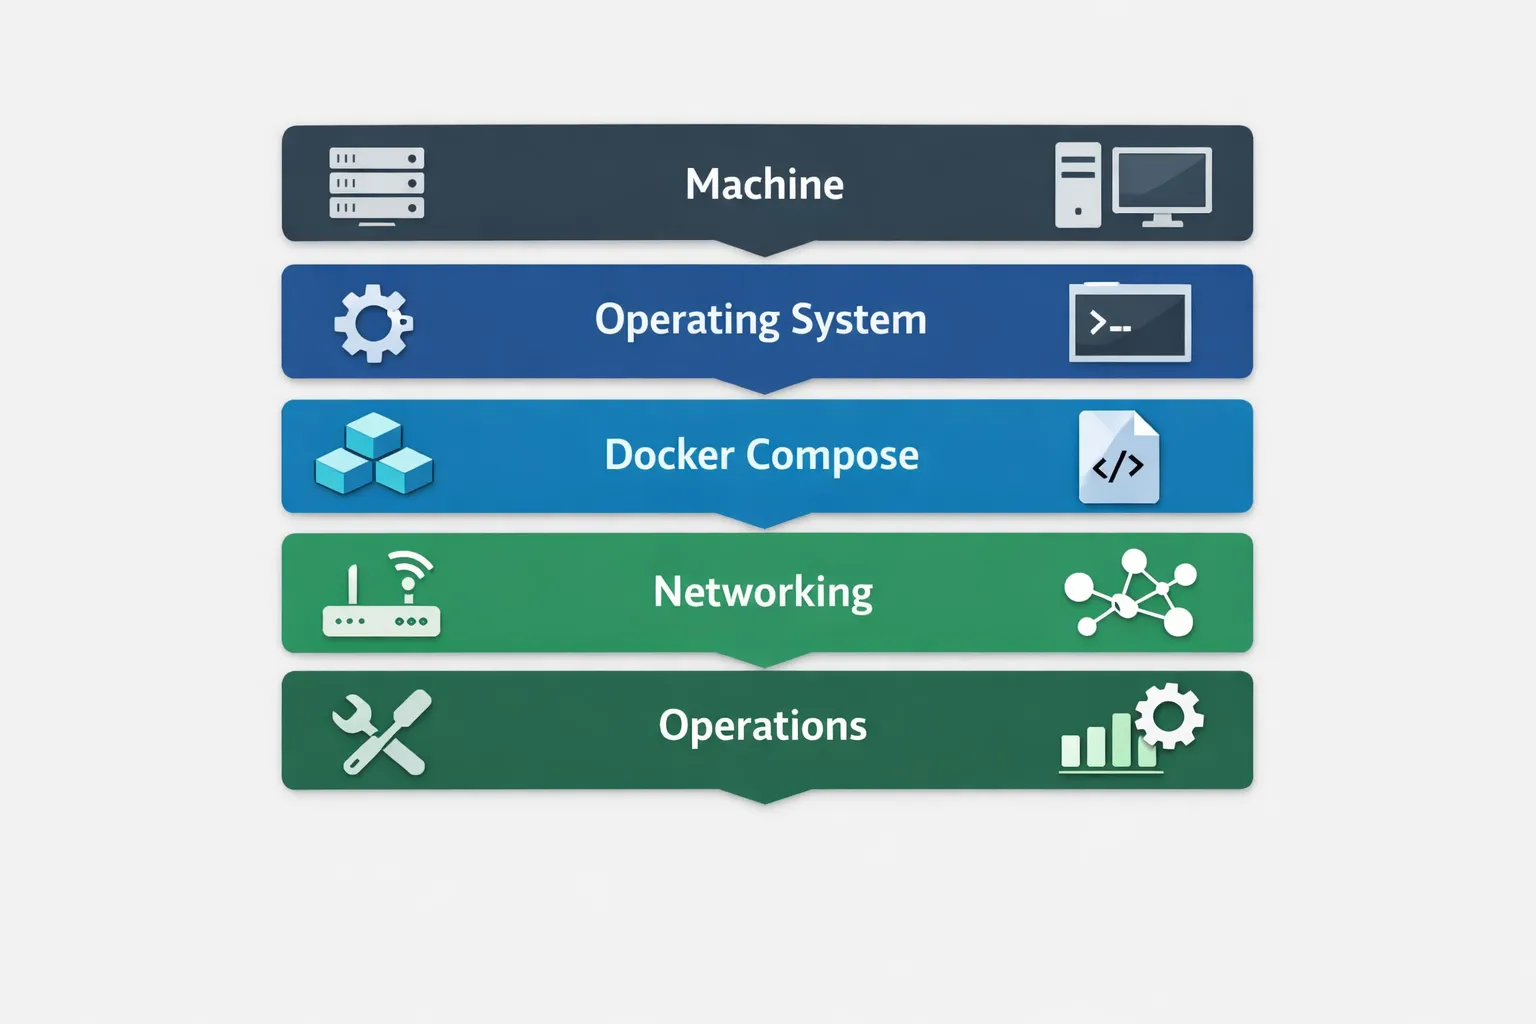
A self-hosted service usually has five layers:
- A machine: A VPS, mini PC, NAS, Raspberry Pi, old laptop, or rented dedicated server.
- An operating system: Usually Debian or Ubuntu Server for beginner-friendly Linux hosting.
- A runtime: Docker and Docker Compose are the default path for most homelab services.
- Networking: DNS, ports, firewalls, reverse proxies, and HTTPS.
- Operations: Updates, backups, monitoring, logs, and recovery.
Most problems happen at the boundaries: DNS points to the wrong IP, a port is blocked, a volume was not persisted, the reverse proxy cannot reach a container, or a service was exposed without authentication.
Start Small
Do not begin by hosting your whole digital life. Start with one low-risk service and learn the lifecycle:
- deploy it
- expose it locally
- add a domain
- protect it with HTTPS
- configure authentication
- back it up
- restore it once
- update it without losing data
Good first services:
- Uptime Kuma for monitoring
- Vaultwarden only if you are disciplined about backups and security
- FreshRSS for RSS
- Homepage or Homarr for a homelab dashboard
- Nextcloud only after you understand volumes, databases, and reverse proxies
Domains, DNS, and IPs
A domain is the human-readable name people use to reach your service, like example.com. DNS maps that name to an IP address.
The basics:
- A record: points a domain or subdomain to an IPv4 address.
- AAAA record: points to an IPv6 address.
- CNAME record: aliases one name to another.
- Public IP: the address visible from the internet.
- Private IP: the address inside your local network, usually like
192.168.x.xor10.x.x.x. - Port: the numbered entry point for traffic, such as
80for HTTP or443for HTTPS.
If you host at home, your router usually receives the public IP and forwards selected ports to an internal machine. If you host on a VPS, the machine usually has a public IP directly.
For home hosting, watch for:
- changing dynamic IPs
- blocked residential ports
- CGNAT, where you do not get a true public IPv4 address
- router port forwarding mistakes
- exposing admin panels directly to the internet
If your ISP uses CGNAT, use a VPS tunnel, WireGuard, Tailscale, Cloudflare Tunnel, or another private access pattern instead of fighting the router.
The Default Stack
For most small self-hosted setups, this is a practical baseline:
- Debian or Ubuntu Server as the host OS
- Docker + Docker Compose for services
- Caddy or Traefik as the reverse proxy
- UFW for a simple firewall
- Restic, Borg, or rsync for backups
- Uptime Kuma for availability checks
- Watchtower only for low-risk automatic updates, not databases or critical services
Docker Compose keeps each service in a readable file. The most important rule is simple: persist state in named volumes or bind mounts. If a database stores data only inside a disposable container layer, you will eventually lose it.
Docker Compose Basics
A minimal service looks like this:
services:
  app:
    image: louislam/uptime-kuma:1
    container_name: uptime-kuma
    ports:
      - "3001:3001"
    volumes:
      - uptime-kuma-data:/app/data
    restart: unless-stopped

volumes:
  uptime-kuma-data:
Run it:
docker compose up -d
docker compose ps
docker compose logs -f
Stop it:
docker compose downUpdate it:
docker compose pull
docker compose up -d
Before updating anything with important data, make a backup.
Reverse Proxy and HTTPS
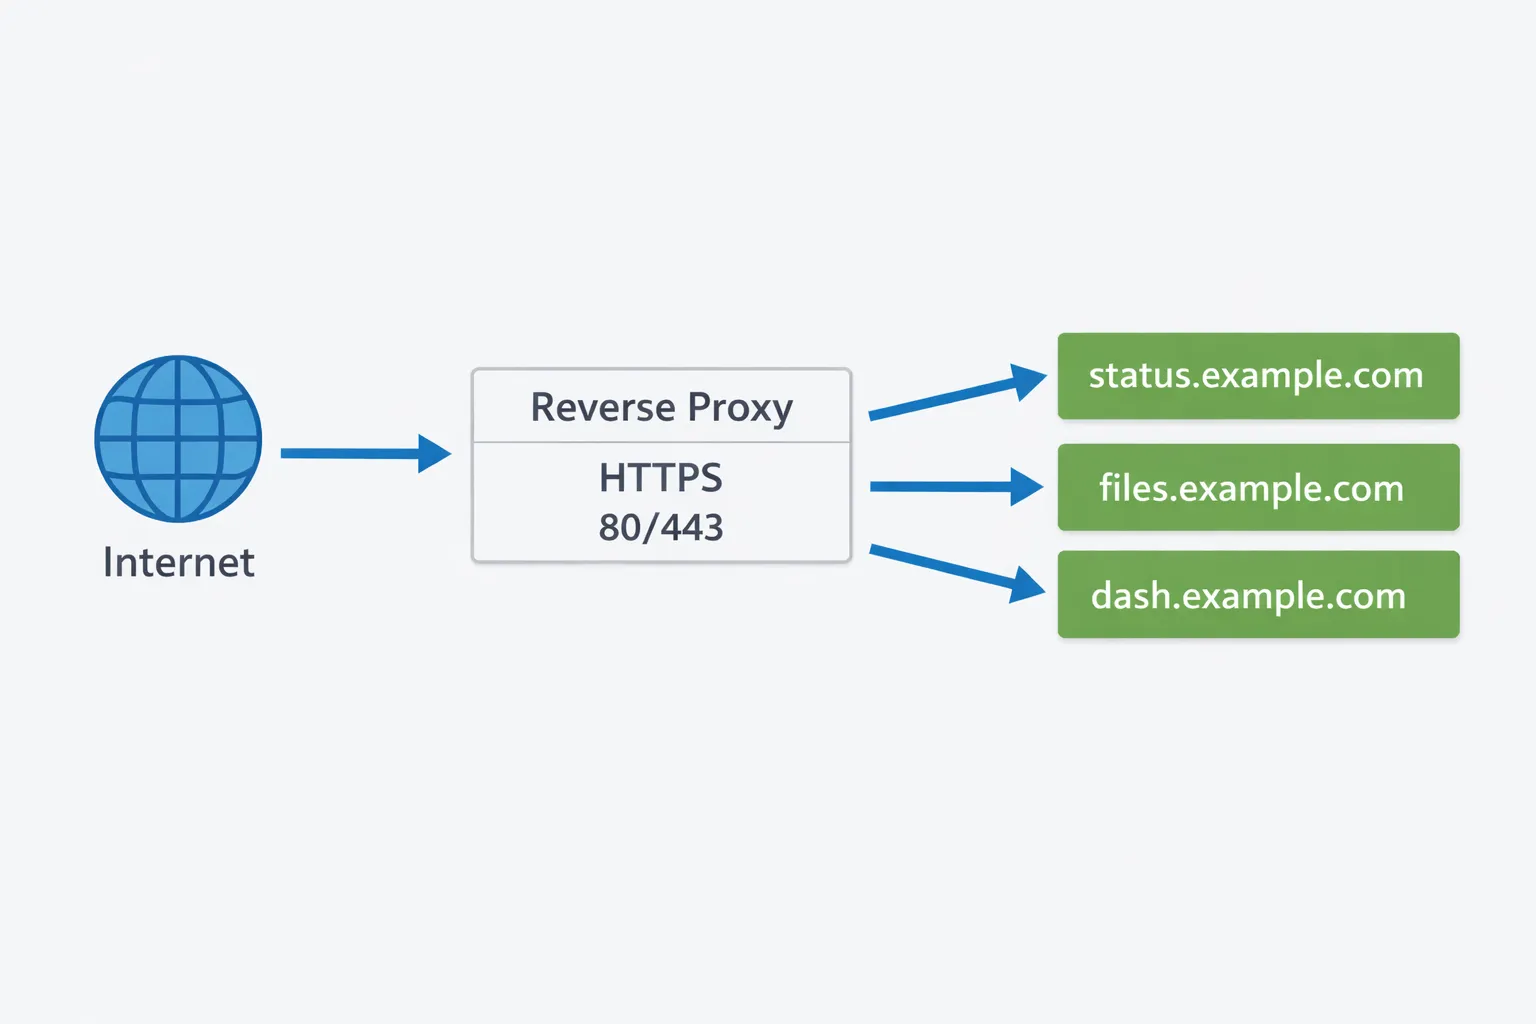
You usually do not want every service exposed on a random public port. A reverse proxy receives web traffic on ports 80 and 443, then routes it to the right internal service.
For example:
status.example.com-> Uptime Kuma on internal port3001files.example.com-> Nextcloud on internal port8080dash.example.com-> Grafana on internal port3000
Caddy is a good beginner choice because HTTPS is built in:
status.example.com {
  reverse_proxy uptime-kuma:3001
}
The production pattern is:
- expose only the reverse proxy publicly
- keep app containers on an internal Docker network
- put authentication in front of sensitive tools
- use HTTPS everywhere
Security Baseline
Self-hosting security is not about paranoia. It is about reducing obvious failure modes.
Start with this checklist:
- Use SSH keys instead of password login.
- Disable root SSH login.
- Keep the OS and containers updated.
- Open only the ports you need.
- Put admin tools behind a VPN, Tailscale, or strong authentication.
- Use unique passwords and a password manager.
- Enable two-factor authentication where available.
- Do not reuse example passwords from guides.
- Avoid
latesttags for critical services when repeatability matters. - Read container release notes before major upgrades.
- Back up before updates.
For a simple Ubuntu firewall:
sudo ufw allow OpenSSH
sudo ufw allow 80/tcp
sudo ufw allow 443/tcp
sudo ufw enable
sudo ufw status
If a service does not need to be public, do not expose it publicly. Private access through WireGuard, Tailscale, or a VPN is usually better for admin panels.
Backups and Restore Tests
A backup you have never restored is only a hope.
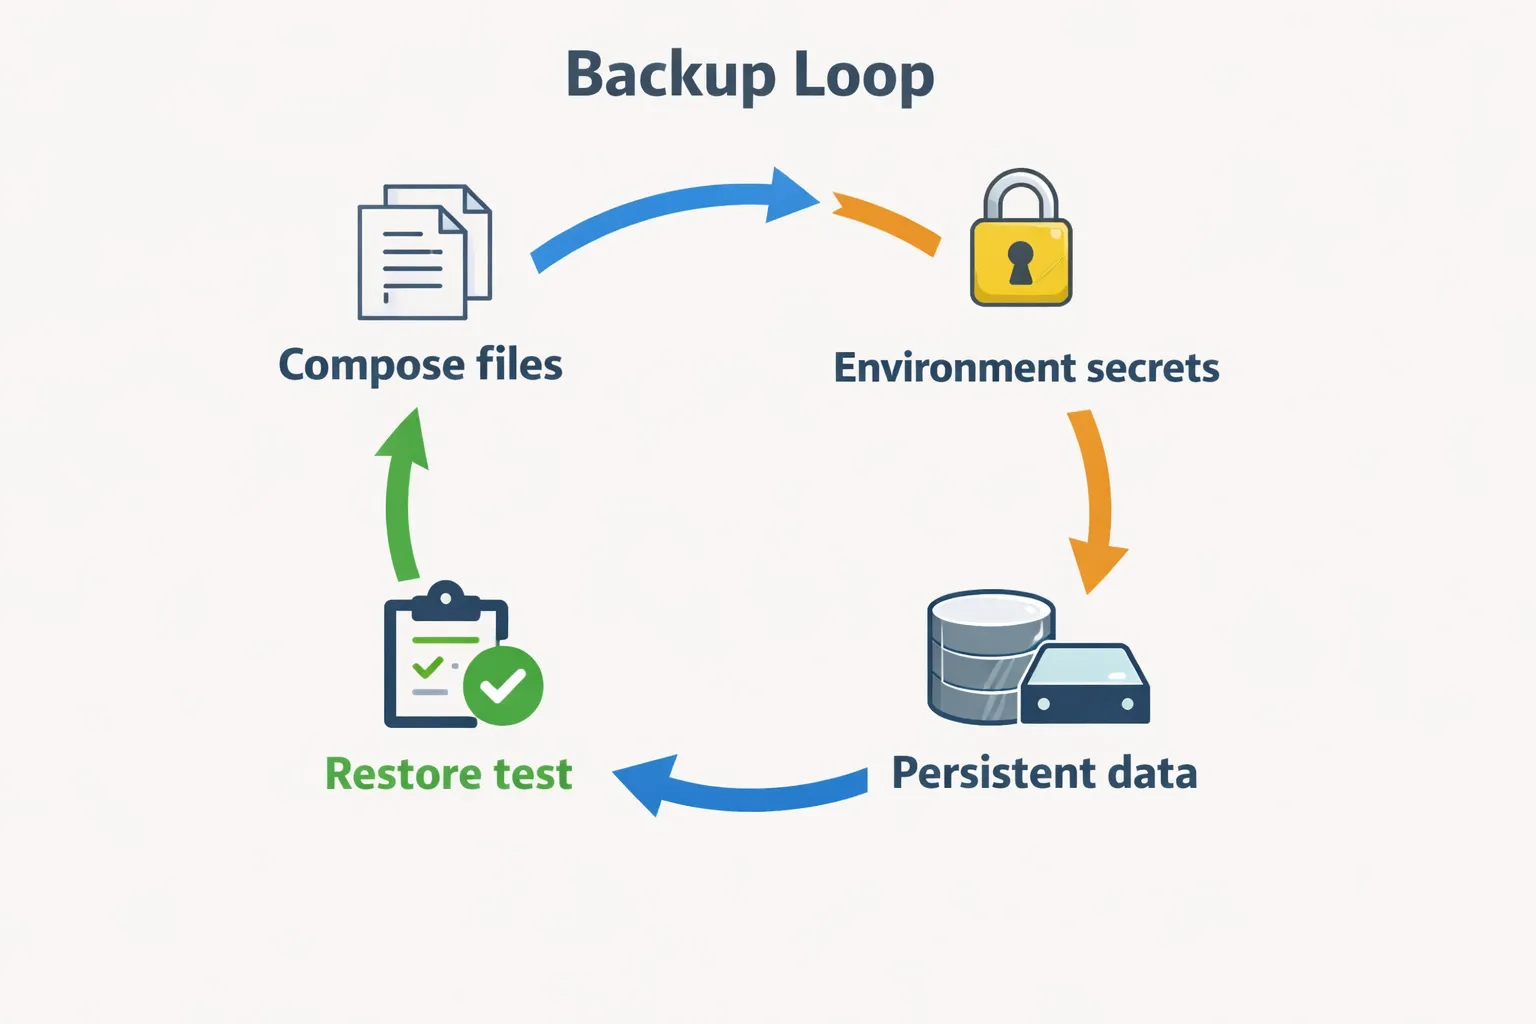
Back up three things:
- Compose files: the service definitions.
- Environment files: secrets and configuration, stored securely.
- Persistent data: volumes, bind mounts, databases, uploaded files.
Use the 3-2-1 rule as a target:
- three copies of important data
- two different storage locations or media
- one off-site copy
For databases, prefer database-native dumps over only copying raw files:
docker exec postgres pg_dump -U postgres appdb > appdb.sqlFor file-backed services, stop the service or use a backup tool that can handle live files safely.
Most importantly, practice a restore on a different folder or test machine. That turns recovery from theory into muscle memory.
Monitoring and Logs
You need enough visibility to know when something is broken.
Minimum monitoring:
- Uptime Kuma checks public services.
- Disk usage alerts before the server fills up.
- Container logs for troubleshooting.
- A simple note of what changed and when.
Useful commands:
docker compose ps
docker compose logs --tail=100 -f
df -h
free -h
sudo journalctl -u docker --since "1 hour ago"
For more advanced setups, Grafana, Prometheus, Loki, and exporters can give you a full observability stack. Do not start there unless you enjoy maintaining the monitoring system as much as the services.
What to Host First
Start with services that teach core patterns without creating high personal risk:
| Service | What It Teaches | Risk |
|---|---|---|
| Uptime Kuma | Docker volumes, ports, monitoring | Low |
| FreshRSS | App updates, persistent data | Low |
| Homepage | Internal dashboards, reverse proxy | Low |
| Grafana | Dashboards, data sources | Medium |
| PostgreSQL | Volumes, backups, credentials | Medium |
| Nextcloud | Databases, files, HTTPS, backups | High |
| Email server | DNS, reputation, deliverability | Very high |
Email is usually not a good beginner self-hosting project. Receiving mail is manageable; reliable sending is where reputation, spam filtering, blocklists, DNS records, and operational maintenance become painful.
A Practical First Roadmap
Use this progression:
- Rent a small VPS or prepare a local mini PC.
- Install Debian or Ubuntu Server.
- Configure SSH keys and firewall rules.
- Install Docker and Docker Compose.
- Deploy Uptime Kuma locally.
- Add a domain or subdomain.
- Put Caddy in front of the service with HTTPS.
- Add backups for the Compose folder and persistent volume.
- Restore the backup once.
- Add one more service only after the first is stable.
That path teaches the whole loop without drowning you in tools.
Where This Book Goes Next
The next chapters focus on self-hosting from a data and analytics angle:
- self-hosted databases for analytics projects
- time-series and document databases
- BI tools like Metabase, Superset, Redash, Grafana, and Kibana
- practical Docker deployment patterns
That is the stronger reason to self-host: not just independence for its own sake, but understanding the infrastructure behind real data products.